User Management Overview
The User Management feature enables you to add or edit user details. You can manage the role and product access of each individual user based on their needs. The Adoption feature helps track usage of the tensai platform and the Audit Log captures the individual activities being performed by the users on the platform providing complete visibility of the actions taken.
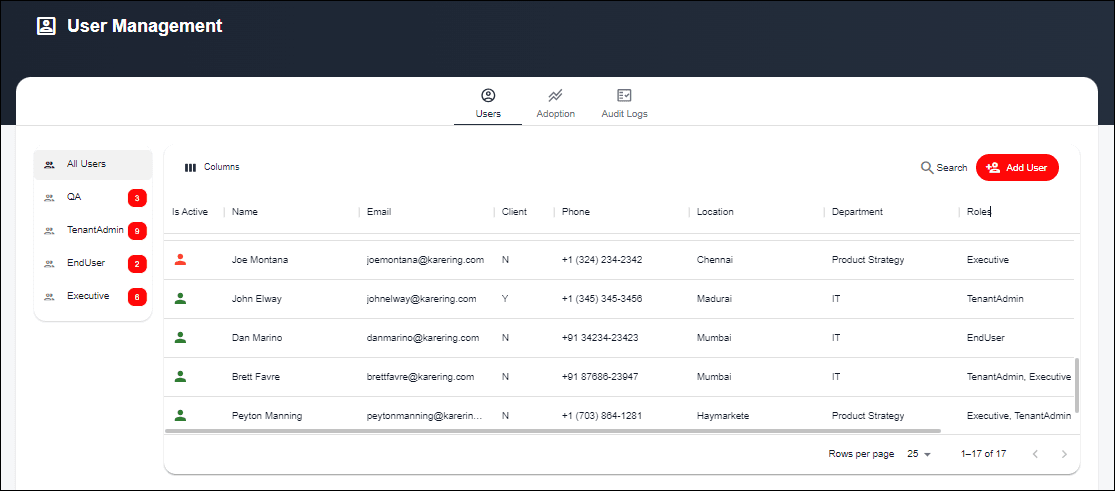
Users
Fields Overview
Add User
- Allows you to add new users to the platform.
Edit User
- Edit user details for any existing user.
Delete User
- Remove users who no longer require access to the platform.
Deactivate/ Activate User
- Deactivating a user temporarily restricts a user from using the platform. You can reactivate a user again as required.
Add User
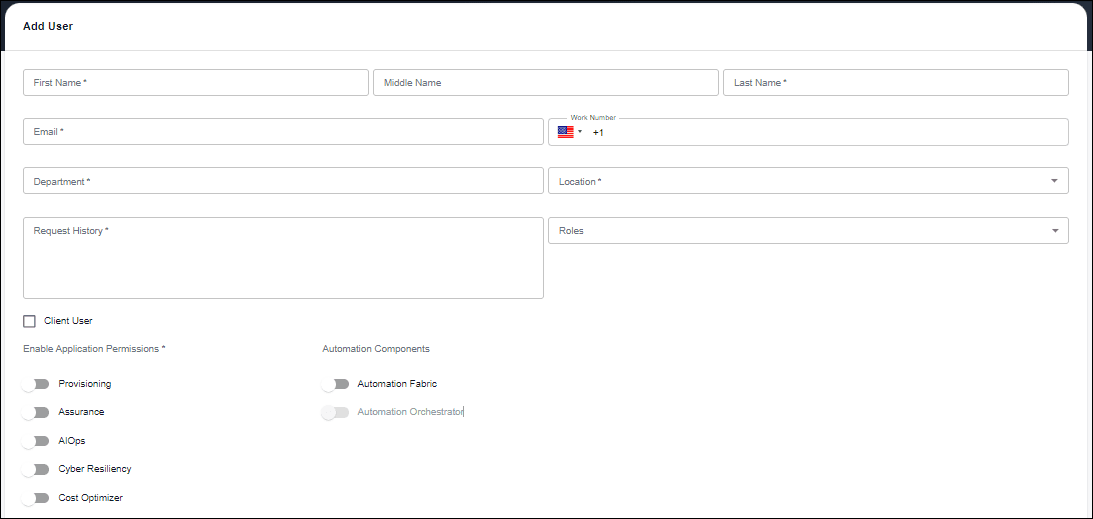
Fields Overview
First Name:
- Enter your first name as it appears on your official documents.
Middle Name (Optional):
- If applicable, enter your middle name.
Last Name:
- Enter your surname or family name.
Email:
- Enter your corporate email address. This must be associated with the Organization you are representing.
Work Number (Optional)
- Click on the flag to select your country code.
- Enter your official work number (excluding the country code).
Department:
- Choose the department you belong to from the dropdown list.
Location:
- Select your work location from the dropdown list.
Request History
- Reason for adding the user to the platform. Add approval, if any.
Roles:
- Select your role from the dropdown list. Note that the roles are specific to your organization.
- You can choose multiple roles for a user. Roles determine the level of access and privileges within the system.
Client User
- Check this box if you are a customer of Hexaware seeking access to the platform.
- Leave unchecked if you are a Hexaware employee rendering services.
Enable Application Permissions/ Automation Components
- Select the applications/ products that are relevant to the user
- The user will be able to view insights only for the ones enabled.
User Request

Fields Overview
Actions
- Navigate to "User Requests" on the left-side Navigation pane.
- Tenant Admins can Approve/ Reject access for users who register to the platform from the Registration screen.
Audit Logs
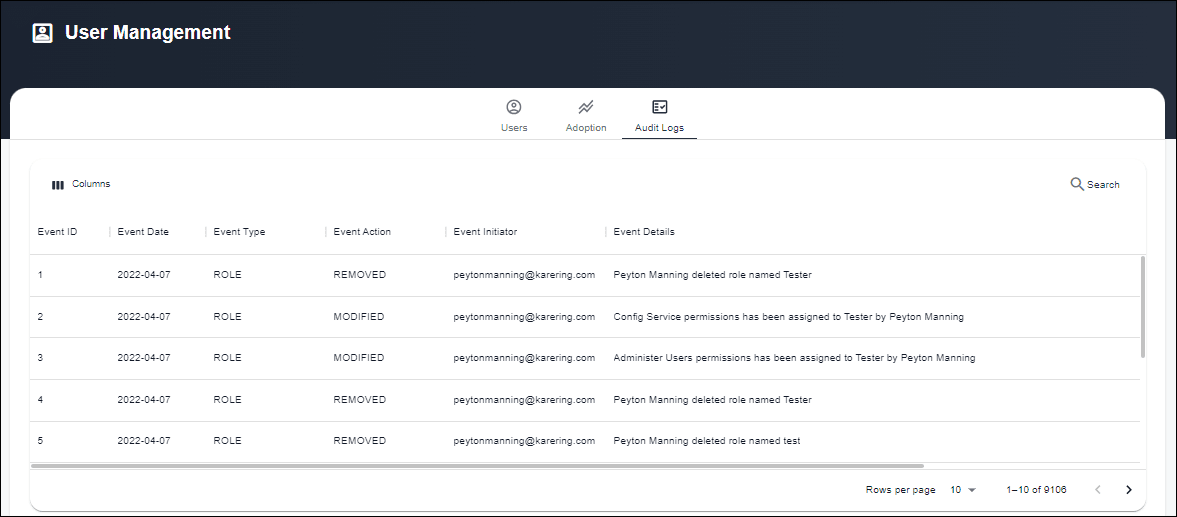
Audit Logs
- View a detailed record of all significant events within the platform.
- It offers transparency and accountability by capturing information about events, their creators, and event details.
Important Notes:
- Assign roles carefully to control access and permissions.
- Regularly review and update user roles to align with changes in organizational responsibilities.
Tips:
- Ensure that user roles are clearly defined to grant the appropriate level of access.
- Train users on the use of their role-specific dashboards to maximize the value of the insights provided."