Widget building (Beta Phase)
Build widgets by consuming data from onboarded product APIs to create tailored widgets based on your needs. These widgets can be visualized in the platform dashboards, fostering a personalized experience within the Tensai® platform.
API Details

- View the list of existing APIs added to the platform.
- Edit an API to change any configured details.
- Delete an API if it is not needed anymore.
- Click on "Add API" to add any new API to the platform.
Add API
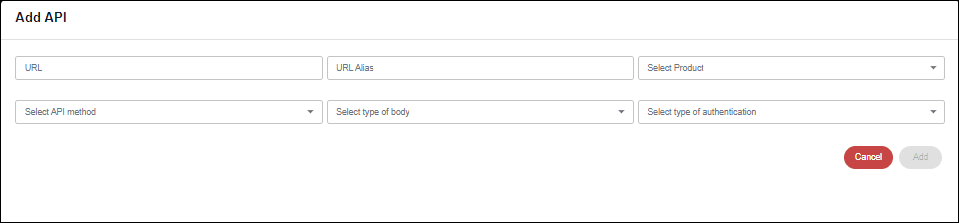
Fields Overview
Click on Add API on the top right corner of the API Details table:
URL
- Enter the specific product API URL from where the data needs to be fetched.
URL Alias
- Add an alias name for the API URL for ease of reference.
Select Product
- From the drop-down, select the product from where the data will be fetched.
- Note: This will only list the products onboarded to the platform.
Select API method
- Select the API method for an API call like GET, POST, PUT, DELETE.
Select type of body
- Select the type of the data body such as raw-Json, form-data, etc.
Select type of Authentication
- Select if there is any authentication type. Select 'No authentication' if there is no authentication type.
New Widgets
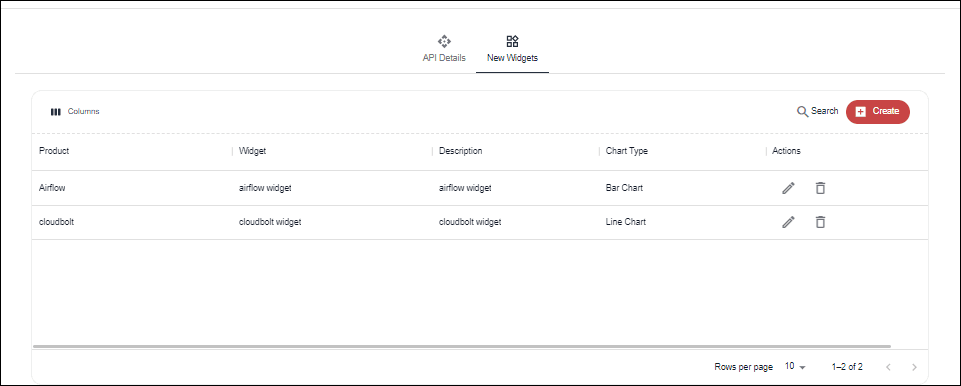
- View the list of all custom widgets that have been built and added to the platform.
- Edit a widget to change any configured details.
- Delete a widget if it is not needed anymore.
- Click on "Create" to create a new widget.
Create Widget
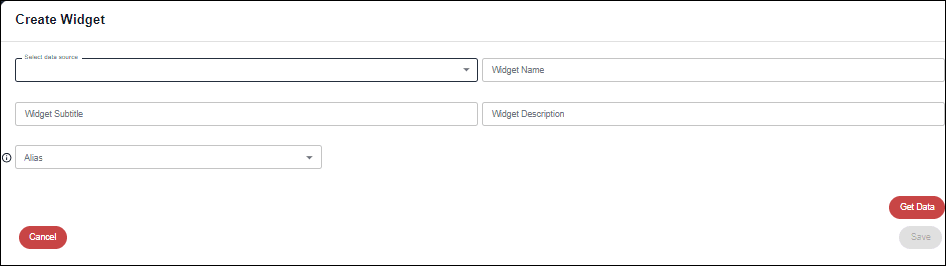
Fields Overview
Click on Create on the top right corner of the New Widgets table:
Select data source
- Select the specific onboarded product from where the data will be fetched.
Widget Name
- Enter a relevant name for the new custom widget.
Widget Subtitle
- Enter a subtitle for the widget that will add more relevance to the widget name.
- Note: The subtitle appears below the widget name.
Widget Description
- Enter a short description that gives the overview of the widget.
Alias
- Select the specific API from the list of APIs that have been added.
Use Existing Authentication
- Select Yes, if you want to use the existing data source credentials. No, if you want to enter new data source credentials.
Body: raw Json
- The payload or data sent as part of the HTTP request is in JSON format. This JSON data is often included in the request body and contains the information that the server needs to process the request.
Authorization
- This will appear if you have selected 'NO' in "Use Existing Authentication" option. Enter the new username and password of the selected data source.
Get Data
- Click here to generate the data from the API.
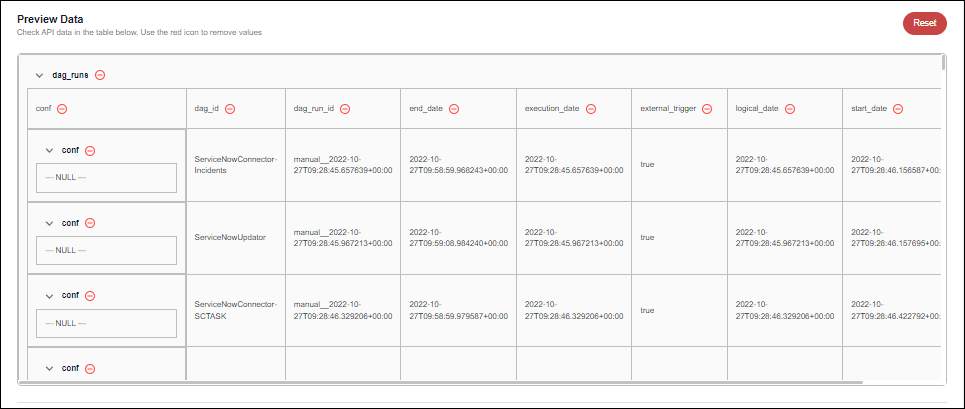
Preview Data
Preview the API generated data in the table below. Use the red icon to remove any unwanted columns. Reset the table to repopulate the removed columns.
Response Attributes
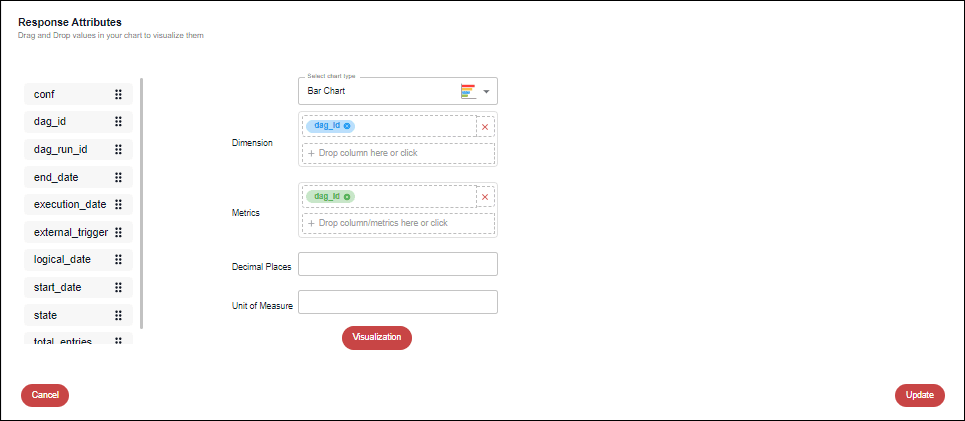
Fields Overview
Select chart type
- Select the type of chart that you want to visualize the data.
Dimension
- Select Dimension from the dialog box or drag-and-drop the same from the left side table. Dimension refers to the X-axis data in the widget.
Metrics
- Select Metrics from the dialog box or drag-and-drop the same from the left side table. Metrics refers to the Y-axis data in the widget.
- Note: You can also set an aggregation type that will aggregate the Metric value based on the selected type (Sum, Avg, Max, Min etc.)
Decimal Places
- Set the number of decimal point digits that must be shown in the chart.
Unit of Measure
- Standardize the metric value by assigning a unit of measure such as Kg, m, etc. It will help express and quantify the amount of the particular attribute.
- Encourage users to document their dashboard configurations and the logic behind custom metrics for better understanding and knowledge sharing.
- Periodically review My Insights dashboards and custom metrics to ensure they align with changing organizational goals and needs.
- Ensure that there are clear guidelines for sharing and collaboration to maintain data security and integrity.